Soldering is a cornerstone of DIY electronics, repair, and fabrication projects. Whether you’re assembling circuit boards, fixing wires, or building custom gadgets, the process brings with it a hidden hazard often overlooked by hobbyists and professionals alike: toxic fumes. The smoke produced when solder melts contains flux, rosin, and metal particulates—all of which can irritate your nose, throat, and lungs, possibly causing long-term health issues. While industrial workshops often employ heavy-duty ventilation systems, home makers rarely have access to professional-grade filtration. That’s where a DIY fume extractor, built around an efficient 6.7 fan, can make a world of difference.
**Why Fume Extraction Is Critical**
The soldering fumes include compounds such as formaldehyde, lead, rosin acids, and volatile organic compounds (VOCs). These can cause headaches, dizziness, fatigue, and respiratory issues after prolonged exposure. Even solder labeled “lead-free” often contains other chemicals that pose risks. Over time, repeated exposure can lead to occupational asthma and other chronic conditions. Thus, proper ventilation and fume extraction are not only recommended—they’re essential for safeguarding your health.
**DIY vs. Commercial Fume Extractors**
Commercial fume extractors work well but often come with a hefty price tag, sometimes hundreds of dollars. Many are bulky, noisy, or don’t fit the workspace of a hobbyist. DIY solutions, on the other hand, can be customized for your bench, budget, and needs. You gain hands-on experience, save money, and get the satisfaction of building something that directly contributes to your well-being.
**Anatomy of a DIY Fume Extractor**
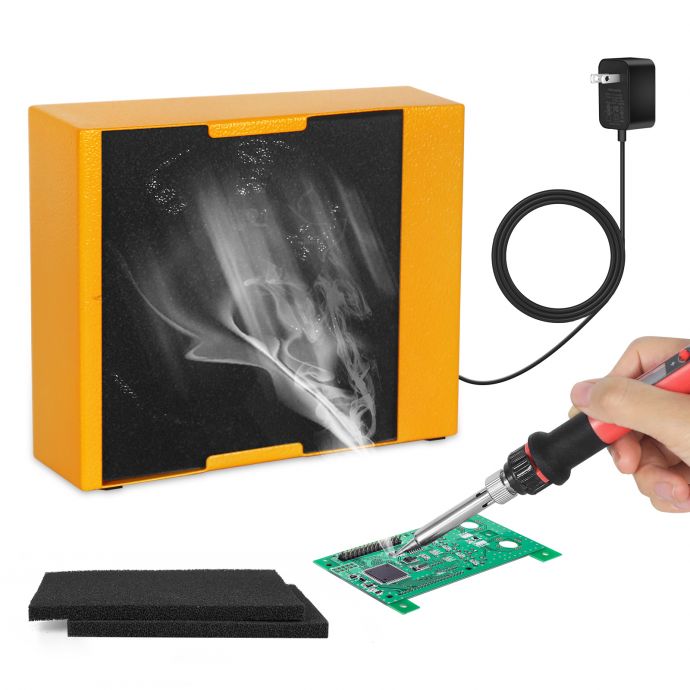
At its core, a fume extractor consists of three main components:
1. **The Fan:** This is the heart of the system. For this guide, we’ll use a 6.7-inch fan, known for its optimal balance between airflow and manageable noise.
2. **Filter:** Activated carbon filters trap fumes and VOCs, while HEPA filters catch fine particulates.
3. **Housing:** This keeps everything together and directs air through the filter.
Let’s explore how you can craft your own effective fume extractor, step by step.
---
**Step 1: Gather Your Materials**
Before starting, collect these parts:
- **6.7-inch fan** (brushless DC or AC, reliable flow rate of 250-400 CFM)
- **Activated carbon filter** (compatible with fan size)
- **HEPA filter** (optional, for additional particulate removal)
- **Power supply** (matching your fan; a 12V DC adapter is common)
- **Switch** (for ease of control)
- **Wiring** (18-22 AWG, length as needed)
- **Housing material** (acrylic sheet, plywood, or sturdy plastic case)
- **Screws and hardware**
- **Foam gasket tape** (for sealing)
- **3D-printed or store-bought fan guard/grills** (for safety)
- **Hot glue or epoxy** (for assembly)
You can find most of these at hardware stores or online. If you already have some parts from old electronics, reusing components is encouraged.
---
**Step 2: Design Your Housing**
The housing is more than mere aesthetics—it ensures the fumes are channeled through the filter, not leaking around it. The design should securely fit the 6.7-inch fan and accommodate the filter at the intake side.
- **Size:** Leave at least an inch of airspace between the fan blades and the housing walls to avoid turbulence.
- **Shape:** Rectangular or cube shapes are easiest to build, but custom designs are possible with 3D printing.
- **Filter Access:** Design the front or the bottom so you can easily swap out used filters.
If you’re working with acrylic sheets, score and snap them to size, then join with solvent cement or bolts. For plywood, predrill and screw panels together. For a more advanced approach, use T-slot aluminum framing.
---
**Step 3: Assemble the Fan and Filter**
Mount the fan securely within the housing, ensuring that airflow is directed outwards (extractor mode, not blower). Place the filter at the front or bottom—where fumes are pulled in. Use foam gasket tape along the filter’s edges to prevent leakage.
- **Fan Orientation:** The fume extractor should sit on your bench, with the filter facing where you solder.
- **Filter Fixing:** Use slide-in rails or compression mounts for easy filter changes.
Avoid directly mounting the filter to the fan; a gap between them increases suction efficiency.
---
**Step 4: Wiring for Safety and Convenience**
Wire the fan to the power supply and incorporate a toggle switch for control. If you're using a DC fan, solder the leads to the switch and power supply. Consider installing a fuse to protect against shorts.
- **Switch Placement:** Mount near the housing’s edge for easy access.
- **Cable Management:** Use zip ties or cable channels to keep wires tidy.
- **Testing:** Before closing the housing, test the fan operation and airflow.
---
**Step 5: Final Assembly and Sealing**
Once the fan, filter, and wiring are secure, assemble the housing and seal all edges with foam tape or caulking. This ensures all air is drawn through the filter, maximizing efficiency.
- **Safety Grill:** Attach a grill to prevent accidental contact with fan blades.
- **Feet or Pads:** Add rubber pads to the housing base to reduce vibrations and noise.
---
**Step 6: Testing Performance**
Place the extractor near your soldering area and power it on. Hold a smoldering solder wire in front of the filter; you should see the smoke being swiftly pulled in. For further testing, you can use incense or a smoke pencil.
- **Airflow Check:** A strong draw at the filter face indicates good extraction.
- **Noise Level:** The 6.7-inch fan typically produces moderate sound; ensure it’s not disruptive.
- **Filter Longevity:** If the filter darkens or airflow decreases over time, replacement is needed.
---
**Enhancing Your Fume Extractor**
While your basic 6.7 fume extractor is highly effective, several optional upgrades can boost performance and convenience.
1. **Variable Speed Control:** Swap the basic switch for a potentiometer or PWM controller to adjust airflow.
2. **Flexible Arm Mount:** Attach an adjustable gooseneck so you can position the extractor closer to your work.
3. **Indicator Lights:** Add an LED that shows when the unit is on or when the filter needs changing.
4. **Noise Dampening:** Line the housing with foam or felt to reduce operating noise.
5. **Smart Integration:** For advanced DIYers, integrate remote control or IoT features using a microcontroller.
---
**Maintenance and Filter Replacement**
Regular maintenance keeps your extractor working efficiently and extends its lifespan.
- **Monthly:** Check for filter clogging, clean housing, inspect wiring.
- **Every 2-3 Months:** Replace activated carbon and HEPA filters.
- **As Needed:** Tighten screws, check for air leaks, oil fan bearings if necessary.
---
**Safety Considerations**
DIY extractors, when properly built, are highly effective and safe. However, observe these precautions:
- **Electrical Safety:** Ensure proper insulation and avoid exposed wires.
- **Fire Safety:** Never leave the extractor unattended in proximity to soldering irons or flammable materials.
- **Filter Handling:** Used filters may contain toxic compounds—dispose of them as per local regulations.
---
**Real-World Benefits**
Users of DIY fume extractors often report noticeable improvements in air quality, reduced irritation, and a more comfortable soldering experience. With dedicated extraction, you can solder for hours with peace of mind, knowing your lungs are protected.
Anecdotal reports from makers reveal that headaches and throat irritation vanish after incorporating a fume extractor. For those with allergies or asthma, the improvement is even more pronounced.
---
**Community and Customization**
Open-source hardware forums (such as Hackaday, Instructables, and Reddit’s r/DIY) showcase hundreds of unique fume extractor builds. Sharing your own design can help others and foster innovation. Customization is key—adapt the extractor to your bench layout, add features, or integrate it with other tools.
---
**Environmental Impact**
By crafting your own extractor, you minimize reliance on disposable consumer products and can select eco-friendly materials for the housing. Choose filters from sustainable suppliers and recycle used components responsibly. Your DIY approach reduces e-waste and lowers carbon footprint—an extra win for the planet.
---
**Conclusion**
Soldering opens up worlds of creativity, repair, and technical discovery. But safety must always come first. When toxic fumes are a concern, the humble fume extractor stands between you and potential health risks. Building your own extractor, centered on a powerful yet manageable 6.7-inch fan, strikes the perfect balance between protection, performance, and maker ingenuity.
In less than an afternoon, you can assemble a personalized fume extraction system tailored to your soldering needs. Your lungs, your workspace, and your overall well-being will thank you. So breathe easy—and let your DIY spirit shield you from invisible dangers. Happy soldering!
---
**Resources for Further Reading**
- "Flux Fume Exposure in Electronics Soldering," Journal of Occupational Health
- EPA Guidelines on Indoor Air Quality
- DIY Fume Extractor Projects (Hackaday, Instructables)
---
By making safety a hands-on part of your projects, you ensure not just creativity, but longevity in your electronics journey. Your DIY fume extractor is more than a tool—it’s a badge of responsible craftsmanship.