If you’ve spent any time soldering—whether you’re repairing electronics, building a custom controller, or assembling a small PCB—you already know the craft comes with a familiar tradeoff: heat, flux, and fumes. Even when the soldering job looks clean, the air around your workbench can quietly collect particles and volatile compounds. Those emissions aren’t just “smoke” in the dramatic sense. Flux vapors and ultrafine particles can irritate your lungs, worsen allergies or asthma, and leave you breathing the byproducts of your workflow.
The good news? You can breathe easier without giving up your DIY spirit. With a carefully designed 12V smoke absorber, you can turn your soldering station into a healthier workspace—safer for you, kinder to your electronics, and far more comfortable for longer sessions. Below is an original, end-to-end guide to building a DIY 12V solder smoke absorber that pulls fumes away from your face and helps keep your station cleaner.

---
## Why solder fumes deserve real attention
Most soldering setups focus on temperature control and tip care. But the air you inhale matters just as much. During soldering you may generate:
- **Flux fumes** (often the biggest culprit)
- **Fine particulate matter** from heated metal and flux residues
- **Volatile organic compounds (VOCs)** released during heating
- **Irritants** that can trigger coughing, headaches, or eye irritation
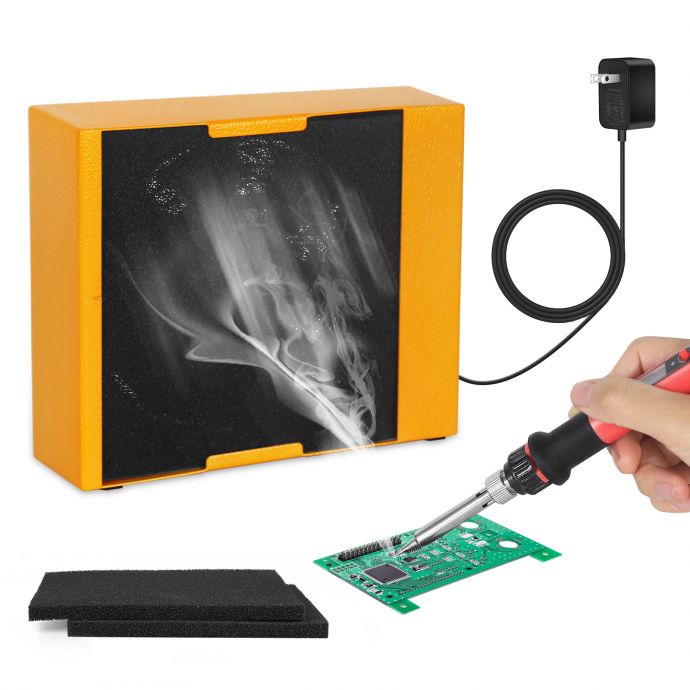
Even “rosin core” solder can produce fumes that aren’t meant for daily breathing. And while fume extractors and ventilated enclosures can help, they’re often expensive—or bulky—so many hobbyists end up relying on cracked windows and good intentions. That’s not enough for consistent protection.
A properly engineered smoke absorber does three things:
1. **Captures fumes at the source** (near the tip)
2. **Filters or routes contaminants** away from your breathing zone
3. **Maintains airflow continuously** so the suction is reliable, not occasional
---
## What “good” looks like in a DIY smoke absorber
Before you build, it helps to define your goals. A strong DIY design should be:
- **Simple to power**: 12V is ideal because many fans and controllers run well at that voltage.
- **Stable and safe**: correct wiring, proper fuse/strain relief, and safe mounting.
- **Effective at capture**: the intake should be close to where you solder.
- **Filtered**: at minimum, use particle filtration (and ideally activated carbon for odors/VOCs).
- **Adjustable**: you want airflow strong enough to move fumes but not so strong it disrupts your work.
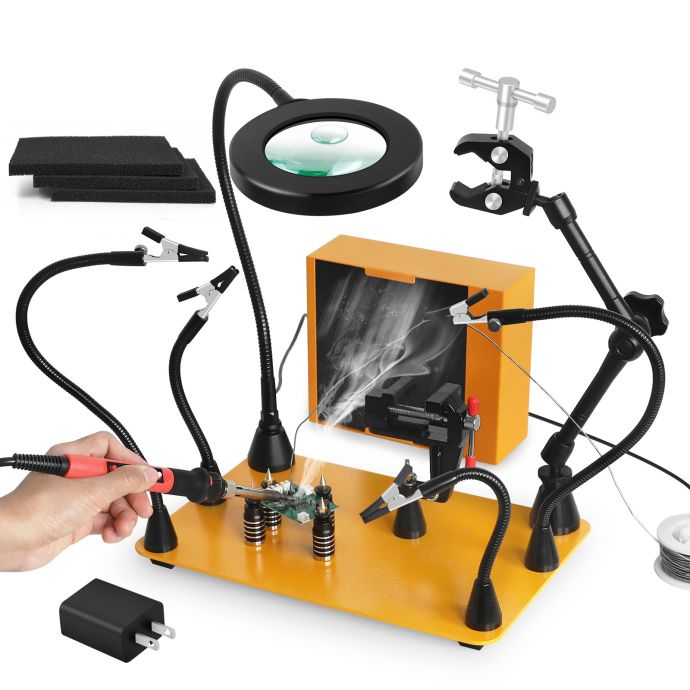
Keep in mind that “suction” isn’t automatically “safety.” Airflow that doesn’t capture at the right spot is just pulling fumes around your bench. The absorber needs to be placed and sized thoughtfully.
---
## Core concept: 12V capture + filtration + ducting
This project is built around a straightforward idea:
- A **12V fan** creates negative pressure in a duct.
- A **flexible suction nozzle** positions the intake near your solder joint.
- A **filter stack** traps particles and helps reduce odors.
- A **duct or housing** channels air safely.
### A few reality checks
- **Activated carbon reduces smell and many VOCs,** but it isn’t magic for everything.
- **HEPA filtration is excellent for fine particles**, and is strongly recommended for particulate capture.
- **No filter means you’re still recirculating contaminants** into your room.
The best approach for most DIYers is a **combination**: particulate filtration (HEPA or a true particle filter) plus carbon for odor.
---
## Materials and parts (typical shopping list)
Below is a typical parts list for a functional 12V DIY smoke absorber. Exact model numbers vary, but the categories are what matter.
### Electronics & airflow
- **12V DC blower or fan** (squirrel-cage blower is often stronger; axial fans are simpler but may need careful sizing)
- **Power supply** (12V adapter rated for the fan’s current draw)
- **Inline fuse** (e.g., 1–3A depending on your fan)
- **Switch** (rocker switch, toggle, or pushbutton)
- **Optional speed control**
- Simple PWM module or fan controller if using a DC blower/fan that supports it
### Ducting and nozzle
- **Flexible duct** (commonly used for electronics ventilation or dust collection)
- **Nozzle tip** (can be a tapered plastic piece or a printable adapter)
- **Hose clamps or compression fittings** for secure connections
### Filtration (recommended)
- **HEPA filter** (or a HEPA-grade replacement filter compatible with your housing)
- **Activated carbon filter** (pellets or activated carbon mat, sized to your housing)
- **Pre-filter** (optional but useful) to catch larger particles and extend filter life
### Enclosure and mounting
- **Enclosure box** (plastic project box, metal case, or a repurposed housing—metal can be easier for stiffness)
- **Mounting base** for stability
- **Rubber feet or vibration dampers** (helps reduce noise)
- **Cable glands** or strain relief for safer wiring
### Tools
- Screwdriver, drill bits, and basic hand tools
- Soldering materials for the device wiring
- Hot glue, silicone sealant, or gasket material for air-tightness
---
## Step-by-step build (12V smoke absorber design)
### Step 1: Choose the fan and determine airflow
Start with your fan selection. Look for:
- Adequate airflow at 12V (check the fan’s specs if available)
- Reasonable noise level
- Easy integration into a duct
If you choose a fan with insufficient pressure, you may pull fumes but fail to capture them effectively at a distance. The fix is usually to:
- Bring the nozzle close to the work
- Use a shorter, smoother duct path
- Prefer a blower type that can handle restriction from filters
### Step 2: Design the airflow path
Your air path should be:
**Nozzle → duct → filter stack → fan inlet → fan exhaust**
Try to keep duct bends gentle and the overall run short. The more restrictions you add (especially HEPA), the more you need a fan capable of maintaining flow.
### Step 3: Build the housing (filter chamber)
Inside your enclosure, create a filter chamber that seals well around:
- **Pre-filter** (optional)
- **Carbon layer**
- **HEPA filter**
If possible, design the chamber so filters are **serviceable**. You want to replace carbon and HEPA later. That means using a removable panel, screws, or a filter cartridge layout.
**Air-seal matters.** Any leaks will pull untreated air from gaps—undercutting your health benefits. Use foam tape, rubber gaskets, or sealants where needed.
### Step 4: Install the intake nozzle and duct connection
Mount the nozzle connection on top or front of the housing. Use a duct that allows positioning near your soldering point. A flexible gooseneck-style hose works well, but avoid kinks.
Best practice:
- Put the intake near where your soldering happens
- Angle the nozzle so it “sweeps” fumes upward and away from the tip
### Step 5: Mount the fan securely and wire safely
The fan should be mounted firmly to avoid rattles. If your housing is plastic, consider:
- Using standoffs
- Using rubber pads to reduce vibration
- Ensuring the fan inlet/outlet fit tightly
For wiring:
1. Install an **inline fuse** in the positive (or live) line.
2. Add a **switch** to control power.
3. Connect the **12V fan** to the switch output.
If you add speed control:
- Use a proper DC fan controller module
- Confirm it supports the fan’s current draw
- Avoid “overdriving” the fan—staying within 12V is simplest and safest
### Step 6: Exhaust placement (critical!)
Do you want to recirculate filtered air back into your room, or vent it outside? Either can work, but each has tradeoffs:
- **Recirculating filtered air**: simpler, but your “cleaner” air still mixes into the room. If you use a real HEPA + carbon stack, this is generally acceptable for many hobby setups.
- **Venting outside**: often better for total contaminant removal, but it requires ducting to an exterior location.
If you vent outside, use a sealed duct from the fan exhaust to your exterior port. If you recirculate, ensure the exhaust area is not blowing directly toward your face or hands.
### Step 7: Add a simple indicator and usability features
You’ll use this device more if it’s convenient. Consider:
- A small LED that turns on when the absorber runs
- A comfortable switch placement on the front of your enclosure
- A storage hook so the nozzle sits neatly
### Step 8: Test airflow and capture performance
Before you solder anything:
- Turn on the unit
- Check for leaks and rattles
- Confirm that air moves through the duct and pulls in a visible puff of smoke from a safe source (like incense in a well-ventilated test area, or a controlled test method)
During actual use, you should notice:
- Less odor buildup at the bench
- Reduced fogging on nearby surfaces
- Less lingering “flux smell”
---
## How to position the nozzle for maximum safety
Even the best absorber will underperform if the nozzle placement is wrong. A few practical placement tips:
- **Aim for proximity**: place the intake close to the soldering point (ideally within a few inches).
- **Don